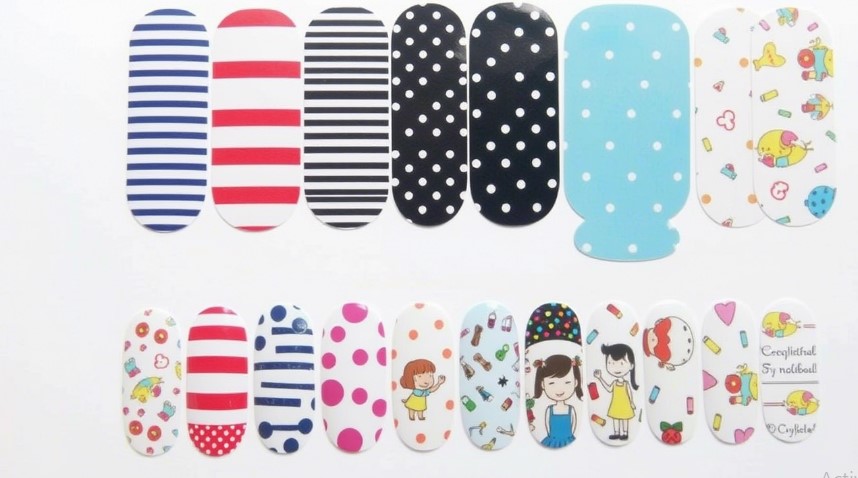
Nail wraps are a popular way to create stylish nails without salon visits. They are thin, flexible stickers designed to fit over natural nails. They come in many colors, patterns, and finishes. This article explains what nail wraps are, their types, how to apply them, and their pros and cons.
What Are Nail Wraps?
Nail wraps are decorative stickers for nails. They are made from materials like vinyl, fabric, or gel. They stick to the nail surface using adhesive. They can last for days or weeks, depending on the type and application method. Nail wraps are a cheaper and faster alternative to gel or acrylic nails.
Types of Nail Wraps
There are four main types of nail wraps. Each has unique features.
- Pre-Designed Sticker Wraps
These are the most common. They come in pre-cut shapes and sizes. Designs include flowers, glitter, or animal prints. They are easy to apply. Peel off the sticker, place it on the nail, and file off the excess. They usually last 5–7 days. - Vinyl Wraps
Vinyl wraps are thicker than sticker wraps. They are durable and last up to two weeks. They often require heat (like a hairdryer) to soften the material before application. This helps them mold to the nail shape. - Gel-Based Wraps
These wraps use a gel-like material. They need a UV or LED lamp to cure (harden). They last 2–3 weeks and look like professional gel manicures. They are more expensive but offer a glossy finish. - Fabric Wraps
Fabric wraps are made from silk or linen. They are glued to the nail and coated with resin. They are strong and good for weak or broken nails. They are less common for home use and often applied in salons.
How to Apply Nail Wraps
Applying nail wraps takes practice. Follow these steps for best results:
1. Prepare Your Nails
Start with clean, dry nails. Remove old polish. Push back cuticles with a cuticle stick. Gently buff the nail surface with a nail file. This helps the wrap stick better. Wipe nails with alcohol to remove oils.
2. Choose the Right Size
Most kits have multiple sizes. Test each wrap on your nails. Pick one that covers the nail without touching the skin. If the wrap is too big, trim it with scissors before applying.
3. Apply the Wrap
Peel the wrap from the backing. Place it near the cuticle. Press down and smooth it toward the tip. Avoid bubbles or wrinkles. Use a wooden stick to press edges.
4. Seal the Wrap
For sticker and vinyl wraps, file the excess. Hold the file at a 45-degree angle. File downward to avoid tearing. For gel wraps, cure under a UV lamp as directed.
5. Add Top Coat (Optional)
Apply an unmistakable top coat to safeguard the plan. This adds shine and helps the wrap last longer. Let it dry completely.
Pros of Nail Wraps
- Easy to Use: No drying time. Apply in minutes.
- Variety: Thousands of designs for every style.
- No Damage: Less harmful than acrylics or gels.
- Affordable: Cheaper than salon visits.
- Long-Lasting: Can stay on for weeks with care.
Cons of Nail Wraps
- Application Challenges: Wrinkles or bubbles if not applied carefully.
- Peeling: Edges may lift if nails are oily or not prepped well.
- Removal Difficulty: Some wraps need acetone to remove.
- Sizing Issues: May not fit all nail shapes perfectly.
Tips for Maintaining Nail Wraps
- Avoid water for 1–2 hours after application.
- Wear gloves when washing dishes or cleaning.
- Apply cuticle oil daily to keep nails healthy.
- Avoid picking at the edges to prevent peeling.
How to Remove Nail Wraps
Removal depends on the wrap type:
- Sticker/Vinyl Wraps: Soak a cotton ball in nail polish remover. Hold it on the nail for 10–15 seconds. Gently peel the wrap from the edges.
- Gel Wraps: File the top layer. Soak in acetone for 10–15 minutes. Use a cuticle stick to scrape off residue.
- Fabric Wraps: Soak nails in acetone for 20 minutes. Peel off the wrap. Buff nails to remove leftover glue.
After removal, wash hands and apply moisturizer.
Conclusion
Nail wraps are a fun, easy way to get creative nails. They save time and money. With practice, anyone can apply them at home. Try different types to find your favorite. Always prep nails properly and follow removal steps to keep nails healthy. Whether you love bold patterns or simple colors, nail wraps offer something for everyone. Give them a try and enjoy beautiful nails without the salon hassle!
FAQs
1. What are nail wraps?
Adhesive stickers for nails with pre-designed patterns; easy to apply like stickers.
2. How long do they last?
7–10 days with proper prep and a top coat for sealing.
3. Do they damage nails?
No—gentle removal with warm water or oil prevents harm.
4. Can I trim them for short nails?
Yes! Cut to fit any nail size before applying.
5. Are they reusable?
Most are single-use, but some brands allow careful reuse.